


Hello Dear Friends! The more I thought about my walls, the less I liked them... or actually, I didn't like them at all. Being old plaster & lathe walls, it was difficult to fix the million (ok, it seemed like a million) nail holes riddled throughout the rooms. I patched them, all the large holes, and many of the cracks with drywall compound (not all the cracks were filled because I do want some of them to show later), but I couldn't smooth down the compound enough afterward. I was getting more and more worried that all my repairs would show through the paint. They definitely showed through the primer. Maybe you can see...

I usually am not worried about perfection, but I didn't want things to look icky. So, I borrowed this from my Mom...

Picked up a 62 lb. bucket of this at the hardware store for $13...

Found an old & rusty paint tray in the barn. Thinned down some of the compound with water...(I stirred it more than this though to mix it better.)

Then I rolled it onto the walls... thicker in some spots than others... (With the exception of the final photo, these all show the wall compound when it is wet. It dries white.)

A couple of close-ups...
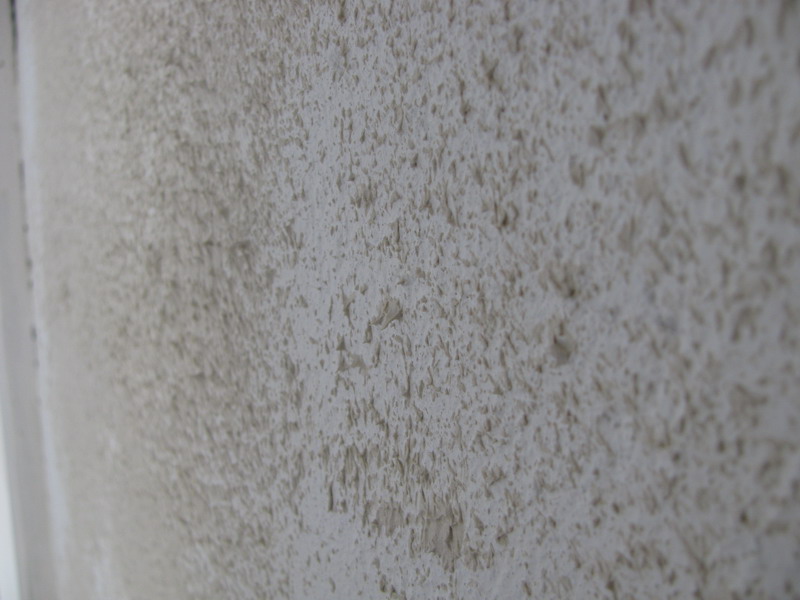

After it dried (over night)... I took a damp (wet, but not dripping works best) rag (aka, old tee-shirt) and worked the surface again. Wiping in a circular motion over all the walls created an 'orange peel look'... or maybe it is called 'knock down' or something in the construction bizz. But, I must say... I am now in love with my walls! Here is a close up of how they look now...

Maybe I should have done the texture before I primed the walls... because I do have to prime them again now to go over all the compound... but really it helped to have the walls white before adding the compound. It made it easier to spot all the nail holes I missed initially. Really, there were TONS of nail holes in these walls!
Anyway, tomorrow I get to prime again... but then I get to PAINT! I did pick up my paint yesterday while I was at the store... so I am ready to move on. Plus, I mentioned before that the trim would be a 'country white'. Well, it just so happens that the store is having a clearance on a particular brand of paint. I was able to pick up two gallons of trim paint that was on clearance for 50% off... plus, the color... GET THIS... is Lambswool White. Isn't that just PERFECT?!
Thanks for letting me share! I'll be interested to hear of any of you have done this wall texture... or are maybe going to give it a try soon.
Wishing you warm smiles...
Betty


I love what you have done with your walls. I'm glad you decided to go ahead with the texture...It looks super. All your hard work is sure paying off!
ReplyDeleteBetty, I love the walls! I can't wait to see the finished room. Happy painting, Leanne
ReplyDeleteLooks fantastic, I have never done anything like it. Sounds like a lot of work but looks worth it!
ReplyDeleteI want to do the joint compound in my kitchen someday but not the second step that you did.
ReplyDeleteMelinda
Looks awesome Betty, love the texture, great job! Can't wait to see it in paint..thanks for your nice comment on my blog...:)
ReplyDeleteThat technique for your walls looks great! Some nice soft texture... kinda looks like lambswool to me! So, the paint is going to make it look even more perfect! I haven't ever been so brave to try anything on the walls but straight paint! lol!
ReplyDeleteBetty,
ReplyDeleteThat looks like ALOT of work but your walls turned out great. Sorry you have to prime again but at least you are happy with your walls now and so close to putting the color on. And what a perfect name your white paint is! Must have been meant to be!!
Super Betty!! Love the texture. Sooo close to getting that paint up. Can't wait to see it!
ReplyDeleteWonderful! You just proved that where there is a will, there is a way.
ReplyDeleteWonderful! You just proved that where there is a will there is a way. : )
ReplyDeleteLove the texture, would love to do that on some of my walls, but too lazy to do all of the steps and I hate painting, lol.
ReplyDeleteDebbie
I like your walls, Betty. That's what we had done with our ceilings when we had the popcorn removed...and they look so much nicer. I'm glad you're getting closer and closer to painting.
ReplyDeleteLove the walls. It sounds like a lot of work but looks so worth it.
ReplyDeleteKeep the pictures and updates coming.
Rhonda
Loving the orange-peel; looking forward to seeing how it'll look after priming and painting
ReplyDelete