


Hello Dear Friends! Being SNOWBOUND has been good for my creative works... my mind is whirlin' with ideas & my hands are smokin' with finishes. From yesterday's post... I thought it would be nice to share my 'how~to' with you... a tutorial & a freebie doodle...
I wanted to come up with a fun name for these... you know, there are pinkeeps, pillow tucks, and ornies... but what could these be called in the PRIM world? Wearable Prims? Top tucks? Punched pokes? You get the idea... remember I've been snowbound... and may be turning a little coo-koo! :)
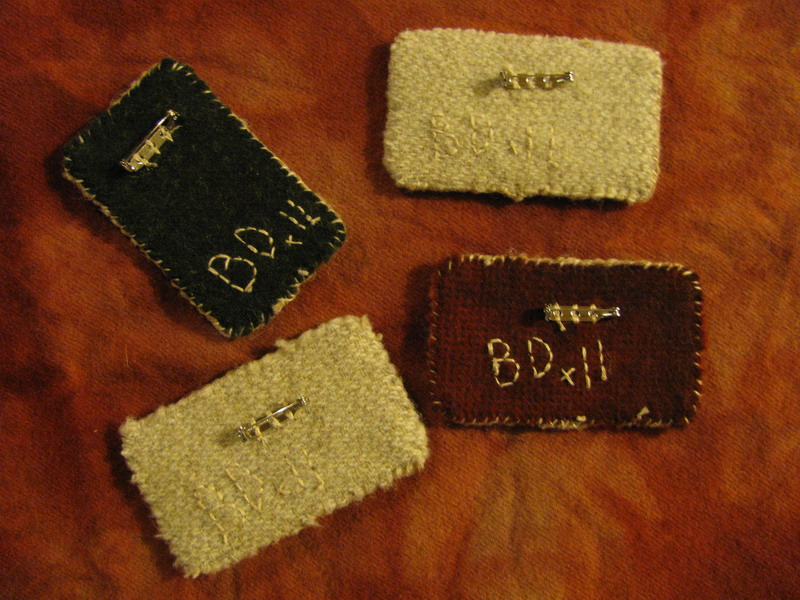
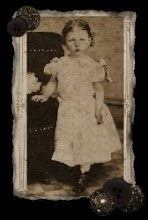
Here are the finished pieces from yesterday...

(Just a reminder, the one with the red saltbox house came from a freebie doodle offered by my buddy Ginger.)
~*~*~*~
Here is how I made them...
Start with a pattern... here is a freebie doodle for you. (You may need to resize it to make it smaller. My finished pins are about 2 1/4 by 3 3/4 inches.) To get the size, I traced a shape that was the size I wanted. I keep my punchneedle threaders between two cheapy, refrigerator magnets. This is what I used as a start for the border.
~*Sheep n' Key*~ Freebie Doodle

My gripper frame is large enough to fit 4 of these shapes... so, because I didn't want to waste too much weaver's cloth... I did 4. Just make sure you leave about 1/2 inch or so between the borders. You can see my refrigerator magnet here too. (notice these doodles are different than the ones in the finished photos... I'm making more. *smiles* )

Punch your doodles... and stain if you wish. I stain mine with a walnut & spice mix... and dry them on a cookie sheet in a low oven.

~*~*~*~*~
Now to begin assembling...
To keep the punches set... because you know these pins are going to be worn time & time again... affix some Wonder Under adhesive to the back. This is an iron~on sort of ~glue. It will serve a second purpose in just a moment.

Trim your punches... leaving about 1/4 inch or so of weavers all around...

Next, visit the recycling bin to grab a thin, cardboard box...

Trace your outline shape on the box... one for each pin you are making...

Here is the second purpose for the Wonder Under... Attach your punches to the cardboard cut~outs. Fold the edges over... but don't worry about making it look pretty... it will when it is finished. I promise!
***Here I need to explain something I learned... and seem to always forget. If you drew your doodles on your weaver's cloth while it was stretched on the gripper frame, your cardboard pieces will be slightly larger than your finished punches. You may need to do what I had to do... a little cardboard trimming. See my slivers of trimmed cardboard?***

For the backing, cut some scraps of wool to fit...

Now to make it all look pretty! I hate to see the white (or stained white) edge of the weaver's cloth around my pieces. I use yarn to finish the edges. Thick hand-spun yarns are best... but you could double up thinner yarns.

Using a sharp needle & thread (I use a thin linen thread, doubled.) make simple stitches to hold the yarn to the edge... sew through the edge of your punch, around the yarn and through the wool. I did feel my needle slip through the cardboard some... but just make your stitches as close the edge as possible. It is not necessary to sew through the cardboard.

Your last step... sew on a pin back & your initials... All done!

So... how about making some? They are wonderful gifts!
Wishing you all warm smiles...
Betty :)
I wanted to come up with a fun name for these... you know, there are pinkeeps, pillow tucks, and ornies... but what could these be called in the PRIM world? Wearable Prims? Top tucks? Punched pokes? You get the idea... remember I've been snowbound... and may be turning a little coo-koo! :)
Here are the finished pieces from yesterday...

(Just a reminder, the one with the red saltbox house came from a freebie doodle offered by my buddy Ginger.)
~*~*~*~
Here is how I made them...
Start with a pattern... here is a freebie doodle for you. (You may need to resize it to make it smaller. My finished pins are about 2 1/4 by 3 3/4 inches.) To get the size, I traced a shape that was the size I wanted. I keep my punchneedle threaders between two cheapy, refrigerator magnets. This is what I used as a start for the border.
~*Sheep n' Key*~ Freebie Doodle

My gripper frame is large enough to fit 4 of these shapes... so, because I didn't want to waste too much weaver's cloth... I did 4. Just make sure you leave about 1/2 inch or so between the borders. You can see my refrigerator magnet here too. (notice these doodles are different than the ones in the finished photos... I'm making more. *smiles* )

Punch your doodles... and stain if you wish. I stain mine with a walnut & spice mix... and dry them on a cookie sheet in a low oven.

~*~*~*~*~
Now to begin assembling...
To keep the punches set... because you know these pins are going to be worn time & time again... affix some Wonder Under adhesive to the back. This is an iron~on sort of ~glue. It will serve a second purpose in just a moment.

Trim your punches... leaving about 1/4 inch or so of weavers all around...

Next, visit the recycling bin to grab a thin, cardboard box...

Trace your outline shape on the box... one for each pin you are making...

Here is the second purpose for the Wonder Under... Attach your punches to the cardboard cut~outs. Fold the edges over... but don't worry about making it look pretty... it will when it is finished. I promise!
***Here I need to explain something I learned... and seem to always forget. If you drew your doodles on your weaver's cloth while it was stretched on the gripper frame, your cardboard pieces will be slightly larger than your finished punches. You may need to do what I had to do... a little cardboard trimming. See my slivers of trimmed cardboard?***

For the backing, cut some scraps of wool to fit...

Now to make it all look pretty! I hate to see the white (or stained white) edge of the weaver's cloth around my pieces. I use yarn to finish the edges. Thick hand-spun yarns are best... but you could double up thinner yarns.

Using a sharp needle & thread (I use a thin linen thread, doubled.) make simple stitches to hold the yarn to the edge... sew through the edge of your punch, around the yarn and through the wool. I did feel my needle slip through the cardboard some... but just make your stitches as close the edge as possible. It is not necessary to sew through the cardboard.

Your last step... sew on a pin back & your initials... All done!
So... how about making some? They are wonderful gifts!
Wishing you all warm smiles...
Betty :)

Those are darling, Betty and your tutorial was perfect!
ReplyDeleteThese are so cute! What about Loopy Gems!
ReplyDeleteWow! You have been busy! They are very cute. Thanks for the tutorial - very helpful and clear.
ReplyDeleteBlessings,
Debbie
I have made some pin backs, but I like how you do yours, mine are too soft, so need to add the cardboard. I got a bunch of pin backs and they are fun to make and give as gifts.
ReplyDeleteDebbie
thx for the tutorial + free image. These are terrific : ) perfect size design for punch needle.
ReplyDeleteI'd refer to them as PRIM Pins ...
Fun to wear, or attach to a bag. my two cents.
Great tutorial...and I love the pins!
ReplyDeleteOh Betty, they turned out wonderful! I never would've thought to stain punch needle goodies! Thank you so much for the tutorial. Oh and thank you for the freebie sheep doodle as well! I've got a punch needle pattern coming soon from American Pie Designs, but I might have to punch a lil sheep or cat pin to get back into the swing of things before I attempt my new pattern! :) It's been a while since I punched.
ReplyDeletesweet! Thanks for the tutorial! the wonder under is a good idea!
ReplyDeleteHow about Primative pin puches, or PPP's?
ReplyDeleteThese are really cute! I love them all and the tutorial is very instructive. Good job!! and thanks so much. I may have to print that out.
ReplyDeleteThanks and you are a very good teacher!!! Will have to purchase some wonder under...GOOD IDEA!
ReplyDeleteStay warm....and creative!!!
Thanks so much for the tutorial and the freebies. You are talented and generous and I love it!
ReplyDeleteCourtney
You did a great job with the tutorial....thanks for sharing your finishing technique....Linda
ReplyDeleteBetty, these are WONDERFUL!
ReplyDeleteBetty ~
ReplyDeleteThe pins are very sweet. Thanks for the tutorial.
Hugs :)
Lauren
These prim pins are fantastic! You are so creative with all that you do- you amaze me! Thanks for sharing the tutorial.
ReplyDeleteDarling pins. What about calling them "wee primages" ? For prime + corsage or prim + image.
ReplyDeleteBetty,what perfectly prim pins!
ReplyDeleteI want to take the opportunity to
thank you so much for all the wonderful
freebies! Could you advise me where to get
the supplies and maybe instructions
to get started needle punching?
It seems that it would be a very
soothing thing to do on wintery
days and nights (we just got 2 feet
of snow).
Warmest Regards,
Susan Burns Western Mass.
All the names offered are just wonderful! Thank you for the ideas & the kind comments! My Aunt read the post & thought maybe they could be called Friend Keepers, Friend Keeps, or even Friend Seekers. Cool huh? |:)
ReplyDeleteSusan, I send you an email with some ideas.
Smiles,
Betty
Betty, wonderful job with the tutorial. Such sweet designs too. I like your idea of the cardboard also. I made a punched piece around this size for my refrigerator. I attached a peel and stick magnet to the back (minus the cardboard), also had to add some tacky glue to get it to stick. but I got so many compliments on it. put it in the local fair one year. Thanks so much for sharing!
ReplyDeleteThanks girl I shared your post on my blog as this is terrific. Question for you can you still sew through the wonder under? I would assume the answer is yes because you did sew around the edge. Thanks Betty you Rock girl.
ReplyDeleteYou are welcome :) I didn't have any trouble getting the needle through the wonder under. :)
ReplyDeleteThanks for sharing this! I'm gonna get to work and make some. :)
ReplyDeleteDoreen